Saturday, June 22, 2013

Craftsy Class Review and Giveaway- QAYG Patchwork Bags

Oh, do I have a good thing in store for you!!! I'm sure most of you remember one of my most recent posts where I did a class review for Craftsy, well Melissa enjoyed my post so much that she asked me to.....REVIEW ANOTHER CLASS!!!!! *happy dance*
So, which quilting class was I asked to review?!?!?  Quilt As You Go Patchwork Bags taught by Tara Rebman (aka Tinkerfrog)! Can we say SQUEEL?!?!? Really though, I knew this class was coming because I follow the instructor on IG (I told you guys, I'm addicted! LOL!) and was soooo excited to watch this class!!!
Disclaimer: The opinions in this post are strictly my own, no one has told me what to say or write nor have I received any form of payment for this review!

Buuut, before I go into my review of this class, just in case you didn't read this post let me tell you a bit about Craftsy first:
   Craftsy is an online educational website that offers TONS of classes for ANY crafting need! They offer not only quilting classes but cake decorating, crocheting, knitting, sewing, and so much more!!!
I absolutely L-O-V-E their platform. Once you enroll in a class (whether it's a free class or one you paid for) you have UNLIMITED access (24/7) that lasts FOREVER!!! You can ask questions you may have and get answers back from not only your instructor but your classmates too, you can take a video note (it helps you bookmark a specific place in the course), share your projects, and so much more! Every class comes with printable course instructions and material lists.
 Craftsy offers not only classes you can buy but they have a HUGE selection of FREE (yes, completely FREE) classes!!!!!!!! I promise you, you can find a class that you will LOVE! Craftsy also offers a place for designers (experienced and newbies) to sale their patterns! You can find a lot of free patterns too!!!

I could really keep going on and on and on about how wonderful Craftsy is, but weren't we here for something else? Oh yeah, A CLASS REVIEW!!!!

(yes, this is a screenshot, I'm "resourceful" that way! LOL!)

Where do I begin?
I guess I'll start with the description from the website....
"Learn the theory behind the quilt-as-you-go technique by working your way through a charming potholder before creating the “Tinker” patchwork bag from blocks you create on the fly. Tara shows you how to use scraps from your stash to build out from a single square using a freehanded approach that celebrates the uniqueness of each quilted bag. Whether you prefer straight-line or free-motion quilting, your extemporaneous blocks will blossom as your bag comes to life. Add a simple pocket or follow Tara’s instruction for a painless hidden zipper pocket. Learn how to add material to the bottom of your bag for extra durability and box corners for extra stability. Finish off your quilted bag with a magnetic closure and eye-catching bias binding. Or hand-sew an invisible binding for extra sophistication"


I love the description they give! It's right on the money (is that the expression I'm looking for? I hope so!)!!! Tara does an amazing job with breaking down the process of QAYG (quilt as you go), and you can take what you learn from her and apply it to ANY quilty project! Tara breaks down this process by teaching you to first make an adorable pot holder, which I think is great because it is a small project, so you don't get overwhelmed! After she teaches you how to make the potholder she moves on to her own pattern, the Tinker Tote! She breaks down the ENTIRE process of putting her bag together, I mean the ENTIRE process! (Even if you are new to making bags after you take this class you can apply a lot of the techniques to other bag projects!)

I can't tell you how much I LOVE this class! Tara knows what she's talking about and makes it SEW EASY to understand! She gives you tons of extra tips along the way to help you out! I learned a lot about (cue horror movie theme song....) bias tape! (I really hated the thought of bias tape before this class, just so you know!) I took away a lot more than what I expected from this class. I've made QAYG bags before, but Tara's method is a lot better than the free tutorials you find on Google.
I can really go on...and on....and on...and on about this class, but you're just going to have to take it to believe me. Then once you do, you can come back here and say "WOW! You were totally right!" LOL!

I really really really wanted to make a Tinker Tote for this post, of course I have way too many other obligations going on right now. Though I did find the time to test out Tara's technique! Do you wanna see what I made?
Of course you do!!!


Aint it purty? :) I really love this clutch! Just so happens, there is a FREE TUTORIAL for this clutch right here on Tara's website! Don't pay attention to my flap though, it's all uneven and out of whack! I still love it though!


Here is a view of the back of my "Crazy Cute Clutch".


I mean, I REALLLLLLY love how this turned out!


It's a really good sized clutch too! I stuffed it full of scissors and rotary cutters for this pic! :)


So, are you all ready to go take this class yet????? I hope so, because the wonderful peeps at Craftsy said I could giveaway a Quilt As You Go Patchwork Bag class to one of my LUCKY READERS!!!
*happy dance* (again)
Okay so here are the details for this giveaway:
I only have on rule: You need to be a follower of mine! (You can now follow me on Bloglovin by clicking the Bloglovin icon in the upper right side of my blog!)
Then all I need for you to do is CLICK HERE and sign in/register! Once you've done that come back here to this post and leave me a comment letting me know you did! EASY PEASY!!!!

ONLY ONE ENTRY PER PERSON!
You have until this Thursday (June 27th, 2013) to enter!
This giveaway is open to EVERYONE!

I will announce the winner of the giveaway on Friday (June 28th)
Edited to add: This giveaway is now closed!
~Hope y'all are having a GREAT day!!~


Friday, June 14, 2013

My Modern Mini Entry

I'm showing you guys this again as my entry in the Modern Mini Quilt Challenge hosted by the oh-so-lovely Jennifer of Ellison Lane Quitls


If this is your first time visiting me I am SOOOO glad to have you stop by! Take look around and stay a while! I hope you'll come back, I've got some fun plans coming together for the future!!!!

What Mini am I going to enter? Well, that was a tough decision! Of course, when I'm faced with a tough decision like this I LOVE to rely on my wonderful InstaGram friends! They helped me decide on....
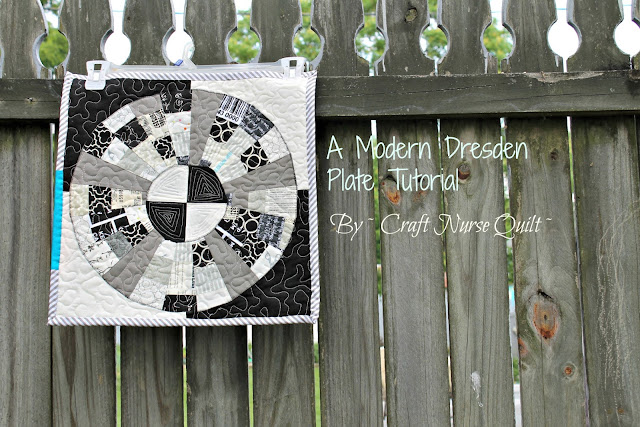
.....this. Which fits perfect since the challenge was to challenge yourself with something new. I did this in several ways. Not only with the Dresden itself but with my FMQ....the echoing you see inside the center circle, yep that was a big challenge for me, and also I wrote up my very first tutorial (link to it is further down)!


I love this mini!!! This is the second Dresden I've ever made! I made my first one (almost just like this one) for one my Bee members. I got some really good feedback on IG for it and a few people asked me to share my process....which is why this one was made! If you would like to read about my process you can click here and see my very first tutorial! (yes, I'm kinda proud of it!)


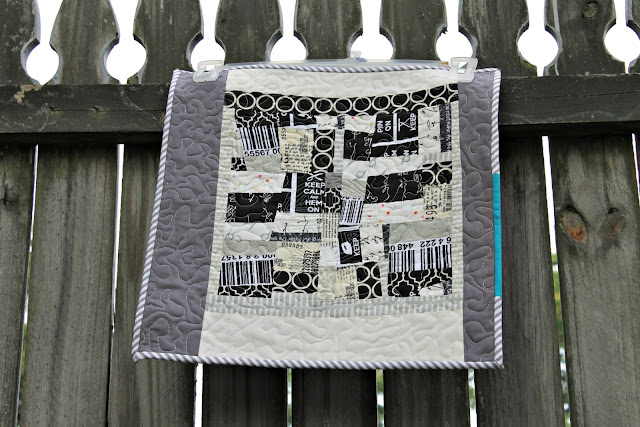
I don't like the look of a single fabric backing so I took my leftover scraps and made a "crazy pieced" backing, I LOVE the way it turned out too!


I'm not too great at the whole FMQ thing, so I tried to "echo" inside the inner circle quarters, it turned out okay, but not what I wanted so I decided to stipple the rest of it. I'm happy with the results!


Here is a close up of the backing!

I hope you like my mini!!! You can always go check out all the other AMAZING modern mini quilts that joined this challenge right here! 

Finished Mini measures about 16" square. Hope you all like it as much as I do!!!!


~Hope y'all are having a GREAT day!!!~

Wednesday, June 12, 2013

A Modern Dresden Plate: my first tutorial!!!!


I've worked really hard on this and I believe it is FINALLY ready! Here is MY VERY FIRST tutorial EVER! Hopefully it won't be my last one! I will warn you this post is VERY photo heavy, I'm a visual learner so I tried to take pics of every step.
Disclaimer: I know there are tons of tutorials on Dresden Plates and I'm not trying to "reinvent the wheel" this is more of a "this is how I did it" type tutorial!
If you have any questions feel free to leave a comment and I will try my best to answer your questions there!!!!
Alright, let's do this!!

A Modern Dresden Plate Tutoiral

Supplies Needed:
- Basic Sewing Supplies
- Fabric Scraps
- EZ Dresden Ruler
- Rotary Cutter & Mat & Ruler
- Olfa Circle Cutter (optional)

Use a 1/4" seam allowance unless state otherwise
"RST"- Right Sides Together


Make sure your press all the wrinkles out of your scraps!


Cut your scraps into varying widths (from around 0.75" to 2/5")


Subcut them into around 5" lengths


Once you have them all subcut start making strip sets by sewing 2 strips RST (chain piecing makes this step go really fast!)


Press your seams open to help reduce bulk


Sew each strip set into a 4 strip unit, until all strips are made into units. You can do this by randomly selecting your fabrics or in a certain order! (I think this would look amazing in a rainbow of colors!!!)
Again, Press seams open to help reduce the bulk

Now it's time to start cutting our Dresden Blades!!!!


Using your Dresden Ruler (I use Darlene Zimmerman's EZ Dresden Ruler that can be purchased at any local quilt shop/fabric store very inexpensively!) line up the 5 1/2" mark with the straight edge of your Strip Unit. (arrow is pointing to where you need to line up at)

In order to waste as little fabric as possible, line up your ruler as close to either side of your unit as you can! Cut around your ruler.


Once you have cut one blade out of your unit, flip your unit around so the bottom is now the top. Realign your ruler with the now top edge and make your 2nd cut. This not only helps save your fabric but it gives you more of a variety in your blades. (I didn't want mine to look uniform)


Here is another example of above step.

I used 21 blades for my Dresden Plate. Once you have cut all 21 blades out...


Lay them out in whatever order you choose. I chose to throw a few solid blades into mine.


Now, pick a place to start. Take 2 of your blades and place them RST, paying more attention to lining them up at the top edges (the larger part of the blade) rather than the bottom edges.


Sew your blades together using your 1/4" seam allowance. Go around your Dresden adding one at a time, I don't like chain piecing on this part because I tend to lose my placement when I do that. You can chain piece if you so choose, I just don't like to on this part! Make sure you go either clockwise or counter clockwise.


Continue in that manner until you have added every blade


At this point yours should look something like this.


Now fold that in half, aligning your last 2 blades to complete your circle. Sew them together with the same 1/4" seam allowance we have been using.


Yours should now look like this


Take it to your pressing board and press flat. At this point I find it much easier to press your seams to the side. Press from the front and back to make sure your seam allowances are lying as flat as possible.
You have now completed the first part of your Dresden Plate!!!! YAY!!!

Now let's get it prepared to add to our base fabric (which I'll tell u more about in just a sec.)

Remember...this is how I DO IT, if you find another way of appliqueing easier than this, feel free to use your favorite method.


I sew around the entire circle (Dresden Plate) using a 1/4" seam. This makes it easier for me to turn the raw edges under.


Once you've sewn all the way around your Dresden take it to your pressing board. I first finger press toward the wrong side up to my stitching line for a few inches, then take my iron and press with it, then repeat that process all the way around.
Flip it over to your right side is facing up and give it a really good press making sure to keep your edges turned in toward the wrong side!


You should have something similar to this.

Now you need to prepare your block base. This Dresden Plate will fit onto a 16" square base. I chose to center my Dresden on my base, but I think it would look pretty cute off centered too!


I'm not big on pinning, but once you position your Dresden on your base you need to pin it down. I think I pinned every 3 to 4 blades all the way around. You don't want your Dresden to slip out of place while you are stitching it down!!!!


With a coordinating thread (you can choose to match the thread to your Dresden or your base, either way will work!) stitch your Dresden down. I chose to use a zig zag stitch, but if you prefer you can use a straight stitch or decorative stitch, or you can choose to hand stitch yours down.


This is how mine looked at this point.


Choose your fabric for the middle of your Dresden. I chose to piece mine to match my base but a pop of color on this part would've been cute too. I use my Olfa Circle Cutter for this part but you can use a cup or any other circular object to cut out your circle. It needs to cover the middle of your Dresden plate by a good 1/2" to 3/4".


Repeat the process of stitching 1/4" around the entire circle and pressing your raw edges towards the wrong side up to your stitching line.


Center your circle over the center of your Dresden Plate and stitch it down using your stitch of choice.

And voila! You have a complete Dresden!!! I forgot to take a picture of the block before I finished it. I made mine into a mini quilt. I'll show you some pics of my finished mini! I LOVE the way it turned out!


I chose to use the rest of my scraps to make a crazy pieced backing. I did a bit of echo stitching in the center circle and chose to stipple the rest.


I LOVE IT!!! :)

I hope you find this tutorial helpful! If you have any questions don't hesitate to leave me a comment or shoot me an email! I'd love to hear what you think!

~Hope y'all are having a GREAT day!!!~


Monday, June 3, 2013

Class Review and Discount!

I was recently contacted by Craftsy and they asked me if I'd be interested in doing a review for one of their new quilting classes. Commence jumping up and down and screaming! Really? They wanted ME to review one of their classes? This can't be real! But it is! I think I'm still in shock! Sooooo.....what class did they ask me to review? Precision Piecing taught by Norah McMeeking.
   Okay, let me be honest for a sec.... I was really skeptical about reviewing this class. I didn't think I'd like it, it's not really "my style" and I didn't want to give a bad review. I feel like if I'm going to review something, ANYTHING, on my blog that I need to be 150% honest and give my true opinion. Because I know when I read a review on someone's blog I want that same honesty. So, I will tell you the truth about what I think.
Disclaimer: The opinions in this post are strictly my own, no one has told me what to say or write nor have I gotten any form of payment for this post!

 
Let me tell you a little about Craftsy first:
  Craftsy is an online educational website that offers TONS of classes for any crafting need! They offer not only quilting classes but cake decorating, crocheting, knitting sewingand so much more!
I absolutely LOVE their platform! Once you enroll in a class you have UNLIMITED (24/7) access to your class! You can ask questions and get answers from the instructors and class mates, make video notes to book mark a place you think is important or need to go back to, and soooo much more! Every class comes with materials provided by your course instructor so you can print them out and have them in front of you! I really really really LOVE the classes I've taken, and trust me, I've taken quite a few!
  Not only do they offer classes you can buy, they offer a great selection of FREE classes! Yes, FREE! Craftsy also offers a place for designers to sale their patterns, you can find some great patterns for free also! I could really go on and on about all of Craftsy's GREAT features but, that's not why we are here, right? We are here for a CLASS REVIEW!


 So, let's get this review started, shall we? I sat down to my IPad after putting the kiddos in bed and started watching. Thinking "I don't know how I'm going to give a review, this is not the class for me" But let me tell you, I was wrong! No, I do not like traditional quilting, No I do not like the instructors fabric selections, but hold up! She's got some great techniques! I mean really, WOW! I love paper piecing, I mean really really LOVE it, but I'm not too great at lining up my points and getting things too accurate. In this class I learned A LOT about...well, precision! Here is the description Craftsy gives for the class:
Norah offers an overview of foundation paper piecing, showing you how to avoid common trouble spots. As you piece blocks inspired by traditional Amish quilts, the windows of Notre Dame and Roman mosaic floors, you'll achieve beautifully matched points, even Y-seams and smooth curves. With Norah's detailed instruction, you'll create intricate designs with the accuracy that quilt-show judges demand.

You will learn how to make 3 quilts, Amish Pinwheel, Stained Glass Window, and Emerald Rings. You will "walk away" with skills on fast and accurate foundation piecing. how to get PERFECTLY "married" seams, the dreaded Y-seams, and so much more!
 I would not recommend a brand new quilter take this class though. You need some knowledge of quilting since this class assumes you already know the basics. 


The instructor knows what she is talking about, she's a very confident and experienced instructor and it shows! I could tell she has a lot of experience teaching. And to me, that makes a difference! 

I really enjoyed taking this class and learned so many new techniques that I can use on so many future projects! I think you all would learn a lot too! So, I have a little bit of a surprise for you! Anyone who signs up for Precision Piecing through my blog post will get.... a 50% discount!!!! All you have to do is follow this link to get your discount! Pretty cool, huh? 

I hope you all will give this class a chance! I promise there is a lot to be learned! In my opinion, you can never know too much! So, go ahead, click here and save some money when you sign up for Precision Piecing! I promise you WON'T regret it!


~Hope y'all are having a great day!!~


Saturday, June 1, 2013

Make It Modern: May's Sponsor

Wow! Is it just me or is time just FLYING by? I mean really, FLYING by? Gah, I keep meaning to post like a ton of things and never seem to get the chance. I guess that's what I get for choosing to sew instead, huh? Y'all will forgive me right? I'll have lots of pretties to show you very soon! (at least I hope!)
So, May has come and gone already! Wow!!!! So I'm going to pretend it's still May, (I'm only a day late!)
This month's sponsor for the Make It Modern Bee is the fantabulous online shop called Pink Chalk Fabrics!
Pink Chalk Fabrics is owned by the ever so sweet Kathy Mack! I'm going to let her about page do most of the introduction here....
In 2008, Pink Chalk Fabrics launched with the mission to provide the best cloth, pattern, and tools available for modern sewists. Our motto here is Do What You Like, Like What You Do. The entire Pink Chalk Fabrics team is dedicated to making your sewing journey a happy one. We appreciate the opportunity to provide you with an experience that will exceed your expectations.


Kathy carries a great choice of Modern quilting fabrics to meet most any sewing or quilting need! I love drooling over her selection! (Please tell me I"m not the only weirdo that does that?!?!?!)
And not only does she carry great fabrics she has an amazing selection of patterns and notions too! I find her site very easy to navigate and her customer service is TOP NOTCH!
So, y'all ready to see some droolworthy fabrics? I know I am!!!
I love me some Pearl Bracelets!

And who doesn't love Lotta Jansdotter's line Glimma?
That's just a few of my favs from her shop...I could really go on forever!!!!
If you guys like getting some great mail on a monthly basis I STRONGLY suggest you check out Kathy's Monthly Clubs there are quite a few of them!

Anywho....Kathy is offering a $25 gift certificate to her shop for one of the Make It Modern members!!!! Y'all know the drill by now, huh? I can't believe we are going into our last month of this Bee!!! It has been a great experience for me and I'm so happy to have made some great new friends! I feel very honored to have been in this Bee with such an AMAZINGLY TALENTED group of women! I can't wait to see what June brings us!!!!!

~Hope y'all are having a great day!!!~