Wednesday, January 24, 2018

   I really need to get back into the gear of blogging and making time to film and edit and sew for that matter! I absolutely hate the hours I'm working, but I gotta do it! *HUGE thumbs down* lol

Anyhow, the reason we are here!!!! I got to test this amazing pattern by the absolutely wonderfully talented Kelly of Jeli Quilts! I absolutely adore her work, and am so inspired by her every single time I see her pop up in my IG  feed.

This pattern is her latest, it's called Goosing Around Again. It is absolutely perfect!


And of course, I had to use a low volume texty background and Kona Solids for the Flying Geese and did it in Rainbow Fashion! I finished up with a black and white striped binding (per usual! lol)

i would say this pattern is for an intermediate quilter. Definitely not for a beginner paper piecer. Although, paper piecing is extremely simple once you get the hang of it, this is definitely not for someone's first time. I strongly suggest easing yourself into paper piecing (I might have a little help for you beginners planned ;))

Now, back to the pattern, it is very easy to follow as long as you know how to paper piece.

Each block is made up of 2 pieces. Each of those make one quadrant of the block.


This block finishes at 12.5" square. so I decided to add some extra color as a border to make it a bit larger.

The awesome thing about paper piecing is that it uses such a small amount of fabric, you can use your scraps for many other things! Of course, I starched the hell out of it before basting it because with all the angles there is nothing but bias on the edge of the block (before the border)

I don't think I could be happier with how this turned out!

These geese give me LIFE!

Of course, I spray basted my mini using 505 basting spray.

I did my normal stipple FMQ quilting for a fast finish.


Machine binding to the rescue (as always!) lol I call it lazy binding, but it gets the job done and I love it!

I used the Ikea Numbers print for my backing. (On a side note, while I'm sitting here writing this post I keep getting side tracked with this new show I just started on Netflix called "Crossing Lines" it's flipping awesome!!!!)

Isn't it just so pretty?!?!? I have to say thank you again to Kelly over at Jeli Quilts for letting me test out this pattern. I already have another one of her patterns that I'm going to start piecing soon, as soon as I get started on a super secret project with a very close deadline.
I highly recommend following her on IG for HUGE doses of inspiration! She's an extremely talented designer and quilter!


Thanks for stopping by and taking a peek at my newest mini! I can't wait to add it to my walls! (I'll do a post about that soon too!) Don't forget to follow me on Instagram right here to keep up with what I'm working on, and see my newest obsession with planning. Who knows, I may do a blog post about that soon too!!!!

Hope y'all have a great day! I'll talk to you soon!!!!


Tuesday, January 16, 2018

   WOW! I can NOT believe it's been over a year since I've written a blog post! That is just beyond crazy! What's even more crazy to me is that it is 2018 already!!!!! Where has the time went? I know 2017 flew by and I couldn't be happier about it.

    I've got a couple post coming up for you this week, this one is the my last 2 finishes of 2017. I did not sew half as much as I wanted to last year, but thankfully I am starting to feel like me again and am LOVING being back at my machine! I do have a lot of plans for 2018, my word for the year is action! I'm tired of talking about wanting to do this and wanting to do that and never doing it....so this is my year to put my words into ACTION!

    And yes, that does include sewing! Oh and by the way (you can blame my sister for this) but I have gotten into the Traveler's Notebook rabbit hole! I have so many ideas of cool things to make for them as well as the actual traveler's notebooks themselves. So you may see a post sneak in here and there about that too!

   Ok, now onto my last finishes of 2017....

As we all know Elizabeth Hartman from Oh Fransson is one of my biggest idols. So, when I found out she had a new craftsy class, I was all over it! I decided to make just one (the purple and pink) just to see how cute it would look as a mini, which I'm obsessed with. (P.S. I started a new job and I absolutely LOVE it, minus the hours I work) I cut and pieced the first mini late at night after work....and I will say, I was very proud of my points considering it was literally around 3-4 a.m. when I pieced this!


Of course my mouth is a little wonky, but I think it gives my bear some character, don't you?


I did a quick stipple for the quitting (I need to branch out on my FMQ, but stippling is just soon fast! lol)
 I decided to go outside of my comfort zone with the binding and chose pink, which I actually really like because it makes the ears pop just a little more.


Here is a close up of my quilting, and no it's not perfect, but it's DONE! lol

I used some Ikea Numbers Fabric for the backing (yes I still have tons hoarded)

And I had to use one of my gorgeous labels from Ananemone

The labels are just perfect.....although I thought about trying to find someone to help me with a new logo......anyone know anyone good with that kind of thing? I totally suck at computer graphics. But these labels from Ananemone are amazing...not only are they a fantastic price point, they last for a really really long time too!!!! And her customer service is awesome (yes this is just my opinion, I purchased my own labels)

   The blue Bjorn Bear came about because it was very close to my son's birthday and he LOVED my bear...so I had him pick out what fabrics he wanted and made him his own! This block, yes it has very small pieces, goes together super fast! It looks a lot more complicated then what it actually is.


He was so happy with the way it turned out! Which of course made Mommy happy! I love that my kids want things made by me! I love the way his turned out too, using Modern Background by Zen Chick for Moda for the background of course, and Kona by Robert Kaufman for the everything else except for the scraps in the ears.


Of course I went for my normal quick stipple for the quilting, but I really love how it blends in with the background so well.


Here is an up close of the quilting, of course it's not perfect but it's finished! lol


I used the Ikea Numbers for the backing of this one too! And my favorite black and white striped binding. (He's got it hanging above his bed and it just makes me smile every time I see it!)


Another gorgeous label from Ananemone added onto his too!

It took me forever to figure out where I was going to put my Bjorn Bear Mini quilt but I finally decided on a place, right above my bed below the Mini Wonky Love quilt I made. It looks awesome there!


I would say I can't wait to fill all these walls up with minis but I am hoping to be moving before too long, so I'll be able to have my own place again....long story, stressful couple years. Thankfully it seems like everything is falling into place now and I feel like ME again!!!!

I'll give you a hint at my next blog post, I'm hoping to have up by Friday or Saturday......it's rainbow, and it's by Kelly Liddle of Jeli Quilts....I AM IN LOVE!!!! I can't wait to share it with y'all!

Anyhow, I have missed this so much! OOOOOOHHHH yeah! I FINALLY finished my Pixel Heart quilt too! I just have to get pics of it! I will be making a list very soon of all my WIP's and Quilts I want to make this year.....like I said I have goals! lol

Make sure you are keeping up with me over on Instagram right here, to get sneak peaks and see what I'm up to when I don't have time to sit down and blog. And yes, youtube videos will be back soon too! I'm making 2018 MY YEAR!!!!!!!!


PS: How do I change this signature??????? Any recommendations of good tutorials would be greatly appreciated! I am so bad with computers, so I am making it a mission to learn more about blogging and editing you tube videos in the very near future! Any tips y'all have would be GREATLY appreciated!!!!

I'll talk to y'all VERY soon!!!

Tuesday, January 3, 2017

Owl Mini and Monthly Challenge

              Happy New Year Everyone!!! I hope you all had a safe and Happy New Year's Eve and Day! I had a pretty good one myself.  I have been so ready for 2016 to be over! I've had a really good start to 2017 and hope it'll continue that way.
          I'm not big on the whole "New Years Resolutions" thing because it just never works out for me. So this year I thought I would do something different, I'm sure that this is not a new by any means but it's something I thought might work for me. And I'm telling you all so you can help hold me accountable. I am going to do monthly goals, each month a new goal based on the previous one. Kind of looking at it as challenging myself to do the things I already want to do or should be doing.
        So my goal/challenge for January is to SEW EVERY SINGLE DAY!!!! Whether it be just 5 minutes or hours, I want to be at my machine EVERY DAY! And I will document my sewing through pictures here on my blog and also on my Instagram and probably on my Facebook, so make sure you are following me on IG and "like" my Facebook page!!!! I would really appreciate it! I'm going to start a hashtag incase any of you would like to challenge yourselves as well or would just like to follow my progress. Since this is an effort to get my "sew-jo" back, I'm going to use the hashtag "#mysewjoback"

    And I've sewn the past few days and actually have my first FINISH of the New Year!!! I'm so happy with the way it turned out too! I decided since Elizabeth Hartman is one of my quilting Idols, I would make something from her Fancy Forest pattern. I chose to make the owl!!!!


Here is a progress picture of me quilting it. I chose to do an allover random square design. I really love the way it turned out!


   I'll show you a close up of the quilting from the front and back too.


The quilting lines are not straight by any means but I'm super happy with the result. I am tired of just stippling all of my projects just because it's easy which is why I chose to do this design.


Here is the finished owl, of course this picture was taken at night in the sewing room so the lighting isn't great. But don't worry, I have daylight pictures too!!!


My daughter helped me with holding it up. The fabrics I used are from Leah Duncan's Arizona line for Art Gallery fabrics. I LOOOOVE this line! And I just had to use Essex Linen in black for the background. It's one of my favorites! I love the texture!


I couldn't be happier with the way it turned out. But to be honest, I like the back just as much as I do the front.


This is right before I finished sewing the binding on. Again, at night in the sewing room.


Here is the back with better light. I used the same fabric line for the back and for the borders/background I wanted to use something different than the front so I chose Essex Linen in Ivory.


Here it is a little closer. Don't you love it?!?!?


And I had to get an up close of the quilting and of my little tag too!!! You can really see the details of the quilting in this picture.

  Again, I am really happy with the way this owl turned out. Not sure what my next project will be....I think maybe use some more of this fabric and make a cute drawstring bag tonight...hmmmm....make sure u follow me on Instagram to find out!!!!

And I would love for you guys to sew along with me....challenge yourself as well, sew EVERY SINGLE DAY, even if its just for 5 minutes. Let's see what we can make!!! If you do remember to use to hashtag #mysewjoback

Linking up for Finish It Up Friday at CrazyMomQuilts
I will talk to y'all soon!


Wednesday, November 23, 2016

Some Quilting Vocabulary and New Video

   Hey guys! I decided to do a little video explaining some quilting and sewing vocabulary. I know that something like this would have helped me a lot when I was first learning how to sew.  So I hope it will help you learn some of the basic terms of the trade. I will be doing some videos showing what I can with some of these words. They will be follow ups to this video and each one will be very short, just showing the basics of the words I went over. Make sure you subscribe to my youtube channel so you don't miss out on any of these videos!!!
I'm going to do a quick run through of the vocabulary words in this post, just incase reading it will help you better than me talking through it.

The link to my video is right here I would love for you to check it out and subscribe to my channel while you are there!!!

These are in no specific order.

~Wrong Side of fabric (aka ugly side) This is the back side of the fabric, where the colors are less prominent
~Right Side of fabric (aka pretty side) This is the front of the fabric where the print is more predominant, the colors are usually more vibrant
~"RST" aka Right Sides Together- meaning the pretty sides of the fabric are facing each other
~Scant 1/4" seam- This means you are sewing a few threads short of a true 1/4" seam (which is the normal seam allowance used for quilting)
~Chain Piecing- It is the act of sewing different pieces in a continuous fashion, it helps with saving thread and also less time consuming
~Wonky- The term used when you sew fabrics at an angle instead of straight, used a lot for modern quilting
~Improv Sewing- The act of designing as you go, not specifically using a pattern, just picking different fabrics and sewing them together. Used a lot in Modern Quilting
~Scrap Fabric- Anything smaller than usually a fat quarter, I will be making a video on different fabric sizes and what I consider scraps very soon
~Machine Feet- Different feet that usually come with your machine, they are used for different projects...attachments used for different types of stitches
~Quilt Sandwich- when you layer the backing fabric, batting, and completed quilt top, the process used when getting ready to quilt the entire quilt.
~Feed Dogs- The mechanism in a sewing machine that feeds the material under the needle
~Batting- also called wadding- The material used to make a quilt sandwich, it goes between the quilt top and the quilt back, there are many different types to choose from, I prefer to use Warm and Natural or Warm and White it's 100% cotton.
~Pressing- The act of pressing your seams, this is different from "ironing" if you "iron" your work you run the risk of distorting the fabric, pressing lets the weight of the iron do the work.
~Basting- The act of combining quilt top, batting, and backing into one to make your quilt sandwich. There are a few different ways to baste a quilt, most commonly used is a safety pin method, my preference is to spray baste, I will be making a video on how to do each.
~Seam Allowance- The area between the stitching and the raw, cut area of the fabric.

There is a lot more vocabulary words that I will be covering, if you have any questions don't hesitate to leave them in the comments either on this blog post or the video.
I would love for you to follow me on social media if you don't already, I will include links to make it easier to find. (as far as my snap chat just search for me!)
Instagram
Flickr
Pinterest
Facebbok
Twitter
Snap Chat: @craftnursequilt

I would love to have you guys follow me on my social media. And for those of you who don't follow me on Instagram, from time to time I have "pop up instasales" with some of my work!

Thank you all for your continued support, means soo much more than you realize!!!


Thursday, September 15, 2016

How To Starch Fabric

Hey y'all! I'm back and this week I'm going to be showing you all how I starch my fabrics. I'm sure there are plenty of different ways you can starch your fabrics, but I'm going to show you how I starch mine. The way I think about it is that it works for me and if it aint broken don't' fix it! lol!
   Make sure you check out my video where I'm showing you exactly what I do. I'm going to try to walk you through it in pictures as well, but the video shows you exactly what I do.


First I'm going to go over the different types of starch that I have came across, my video goes a little more in depth about them so I'm just going to give you a quick run through of them.

The first type of starch is Niagra, it can be found at almost any store for really cheap. I have used Niagra and it's not that bad, but now I just use the spray bottle it came in.

The 2nd type of starch is Mary Ellen's Best Press, this is the type that I use every day. I normally buy the refill bottles (the large bottle in the picture above) and pour it in the Niagra bottle and use it that way. If you just want to try it out you can get the smaller bottle (it's the orange in the picture) to see if you like it. I love the scents it comes in and I love the way it makes my fabrics feel.

The last type of starch (or starch alternative) that I'm going to talk about it Flatter by Soak. I really really love this product, the smells are absolutely amazing! My only problem with this type of starch is the price point. It is a lot more expensive then the other 2 I've talked about. And me being the penny pincher I am I can't afford to use it. I use a lot of starch and the size this type comes in would probably only last me for maybe 2 projects. It is an amazing product though.

Now, I'll go over how and why I starch my fabrics.

The reason I like to starch my fabrics before I even cut them is I feel that starched fabrics are easier to work with, the starch makes them feel almost paper like. I feel like I can cut the fabric more accurately and also piece more accurately when my fabrics are starched.

the first step is to lay out your fabric on your pressing surface. Pictured is a fat quarter but you can use this process with any cut you have.


Now spray your fabric lightly but thoroughly with starch.


Flip your fabric over to the opposite side from which you just sprayed.


Using a hot iron (I prefer to not use steam but if you prefer steam that is fine too!) press until the fabric is dry to touch. Be careful not to distort your fabric.


Once you have completed pressing your fabrics go ahead and spray again with starch. You will be spraying the side that you just pressed.


Flip over the fabric again and press until dry. The reason I spray one side and press from the opposite side is that the starch adheres to the fibers better this way. You will press this side until it is completely dry, again being careful not to distort your fabric.


Now you can repeat until you get the desired stiffness. I normally only do the process once, meaning the starch is sprayed on the front and back of the fabric. You will notice a big difference in the drape of your fabric once you have starched it. You don't need to worry, the starch will wash out.

When I'm working on a quilt block once I complete the block I will starch it as well as any completed quilt top too.

I hope you found this helpful and that you checked out my video! I would love if you would subscribe to my YouTube channel as well as follow me on my social media!!!


I will talk to y'all soon!!!


Tuesday, September 6, 2016

Basic Quilting and Sewing Supplies

      Hey everyone! I know I've been MIA for a long time now, but right now it's time to change that! Over the past few weeks I've been working on filming and editing a few different videos for my YouTube channel. Which also means I've been taking a lot of pictures for my blog too! With my videos I'm mainly focusing on beginner quilters. The reason for that is when I was learning how to sew I would try to find the answer to my questions on blogs, youtube, google everywhere! There was a lot of things I couldn't find online so I just had to guess the answer and learn through trial and error. I remember a lot of the things I would try to find online and I know if I had the question someone else will too. Not all of my videos are going to be focused on the beginner I've got some tutorials coming as well, the tutorials are for everyone, I'm going to break them down and make them as easy as I can that way a beginner can make the project too. My goal is to upload a new video at least once a week with a corresponding blog post, I may throw some random blog posts in during the week too, so make sure you subscribe to my blog and YouTube channel so you don't miss any of my videos or blog posts! I would greatly appreciate it!

    Now, my first video in over a year is what you need to get started sewing or quilting. Just your basic supplies and some optional things that I use. In the video I left out a few things, it's hard to remember everything sometimes! But I made sure to get pictures of everything for this blog post.
So, this is what anyone that wants to start sewing will need to have in order to do so.

To watch my new video just click here!


First thing you will need is a sewing machine! This is a picture of my Juki TL 2010Q. If you are just starting to sew I would not recommend getting this machine, you will just need a basic sewing machine, it doesn't have to be fancy or expensive either. My first machine was a Brother that I got at walmart on Black Friday for around $25.


You will need some thread, I use Gutermann mainly, I love Aurifil as well it's just harder for me to get in my area. I use white for most everything I sew, you can use whatever color you prefer, I just find white to be the easiest because it goes with everything!

You will need needles, using a fresh needle with every project is a good idea. (I will admit I'm terrible when it comes to changing out my needles though!) You will also need a pair of thread scissors, they are a lot easier to use to snip a thread than a large pair of fabric scissors. And you will need a seam ripper! As much as any quilter hates using them we all have to have them, everyone makes mistakes, my seam ripper was my very best friend when I was learning how to sew.

Every sewing machine comes with a bag of different items for your sewing machine. The picture below is what I received with my Juki. It includes different presser feet, oil, screwdriver (for changing presser feet and needles), and a seam ripper. Depending on the machine you have the items in your bag will probably be a bit different. Every machine I own has came with at least a few presser feet, screwdriver, and seam ripper.

You will need pins and some sort of pincushion. In the picture below I have 3 different examples of pincushions. The purple square is a magnetic pin holder, the larger pincushion is one that I made, and the smaller one is an amazing cushion that my friend Kari made for me. You can never have too many pincushions (I PROMISE!)


You will need a lint brush, this is used to help clean your machine and get all the lint out (you will probably get one of these with your sewing machine.) You will need extra bobbins that fit your machine so you don't have to stop and wind a bobbin every time one runs out, it saves a lot of time.
You will need some extra needles and pins as well.


This item is optional but I absolutely LOVE using them. They are called Wonder Clips by Clover. They are used as a replacement for pins. When you are first getting started I recommend using regular pins though.


Next you will need a basic iron. It doesn't have to be fancy it just needs to get hot! Some people prefer using steam while pressing, some don't...I'll leave that up to you.

You will need an ironing board or pressing board (I know mine is filthy, I need to recover it.) If you want to learn how to make your own pressing board I have a video on how to make one right here. It's really easy to do.

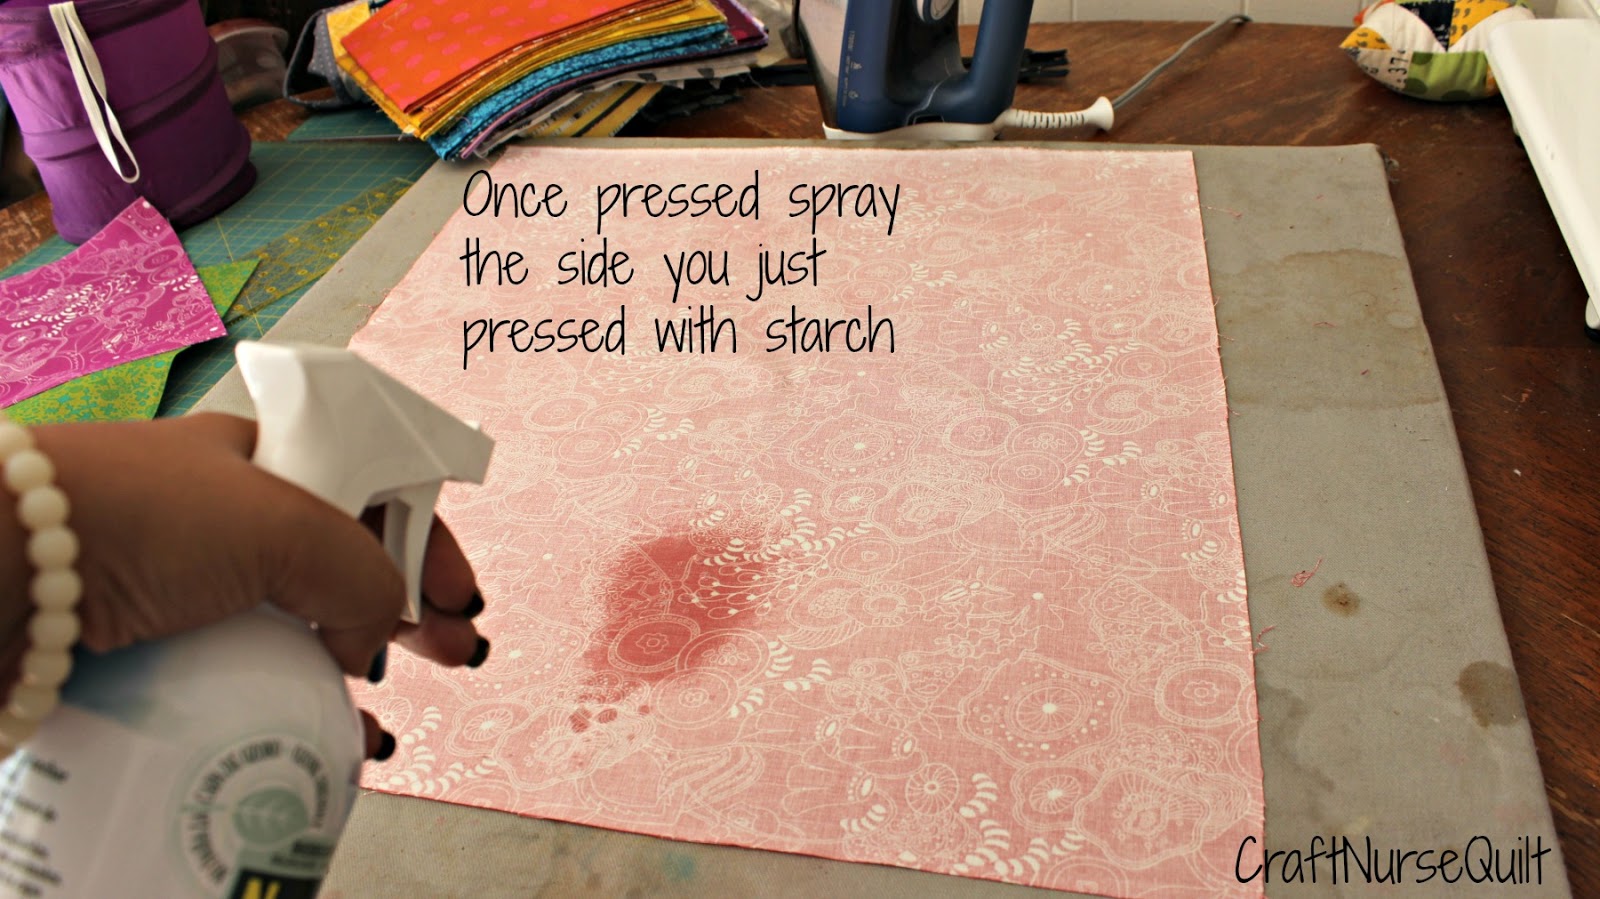
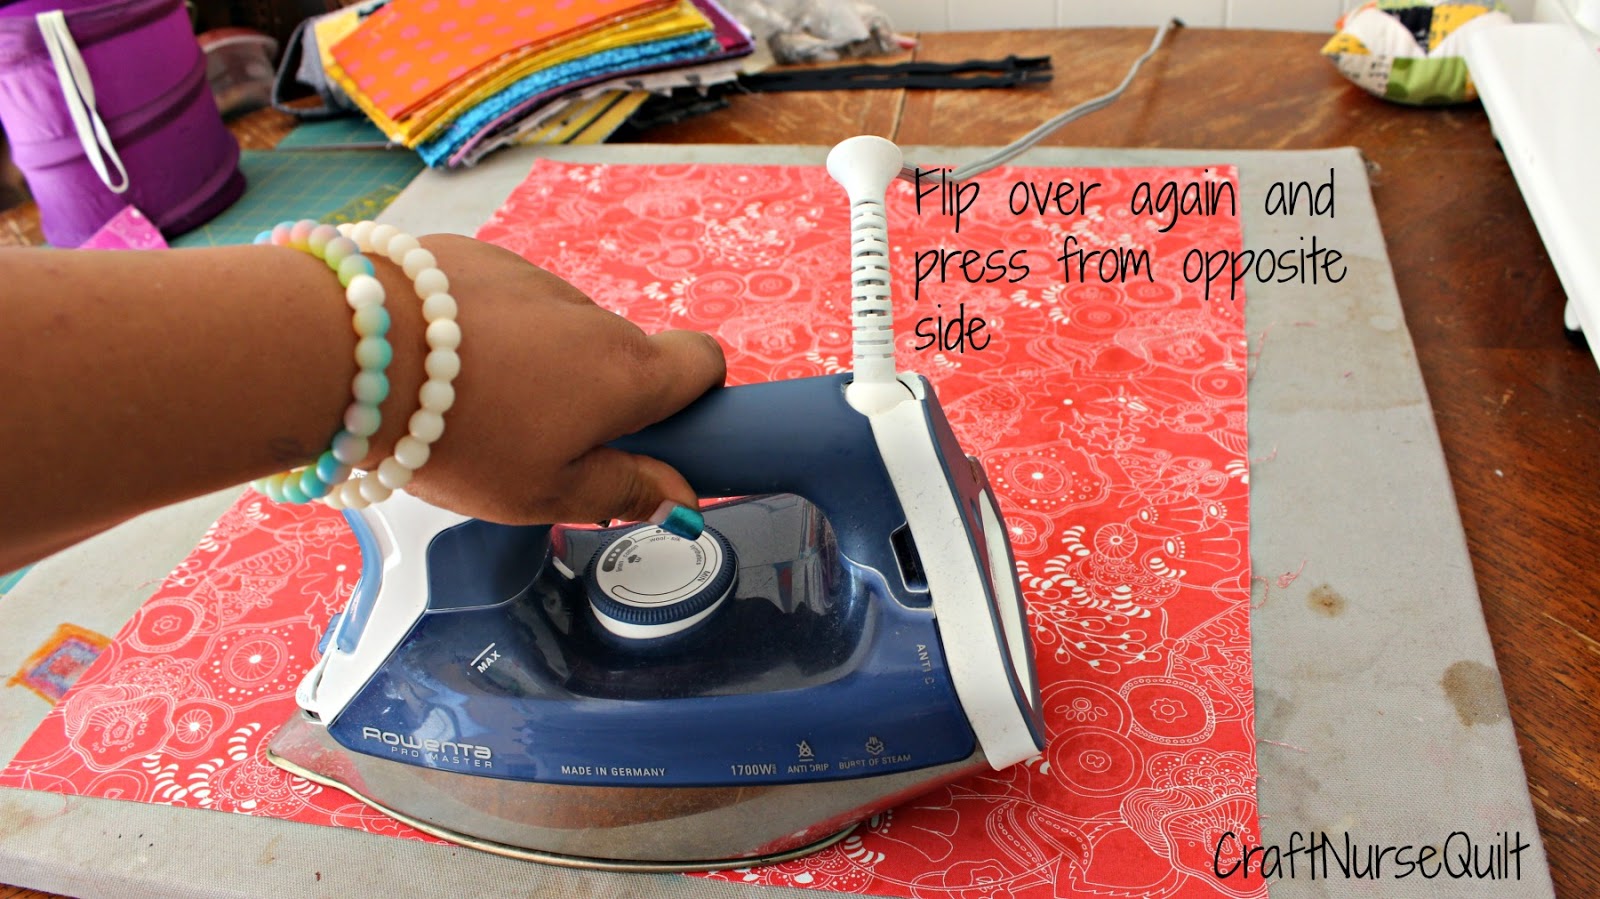
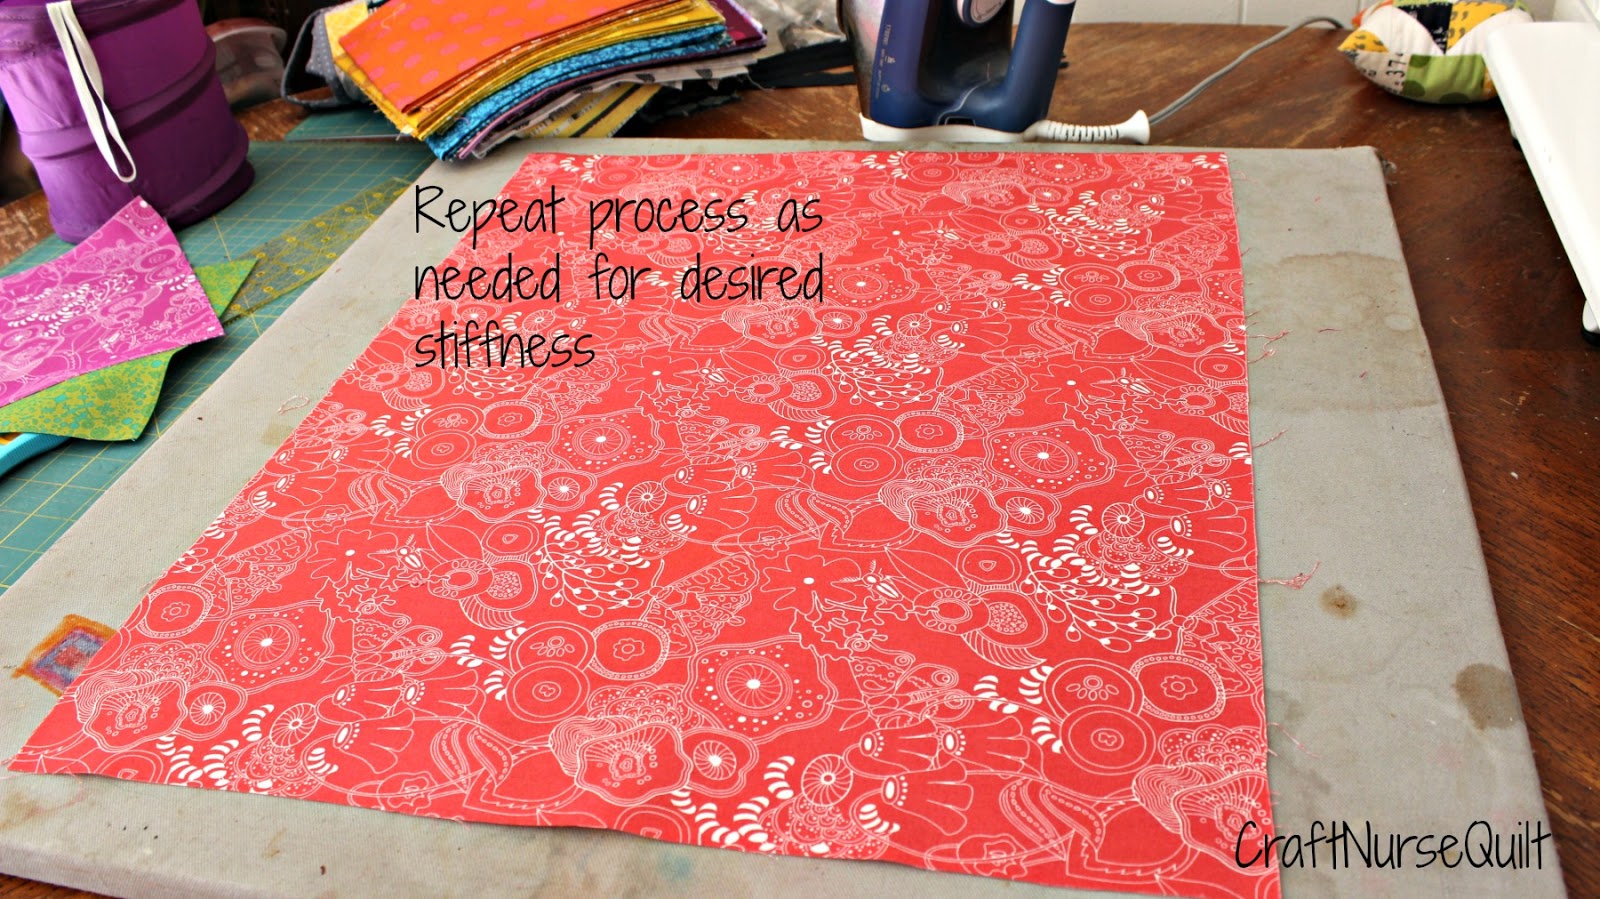
I use a lot of starch when I'm sewing, of course it is optional but I strongly recommend using it. I'll have a video coming soon on how I starch my fabrics. I use Mary Ellen's Best Press but there is a lot of different types of starch out there.

This is my mini trash can or thread catcher. You don't have to have one of these I just find it very useful to have it in my sewing area to throw my threads and trimming in, instead of having to go to the trash can every time I cut something.

You will need a rotary cutter,  a self healing rotary cutting mat, and some fresh blades for your rotary cutter. These are very very sharp so make sure you keep it out of reach of little hands and keep yours locked when not in use. In the picture are examples of different sizes of rotary cutters, I recommend starting with a 45mm, I use that size the majority of the time.

You will also need a pair of fabric scissors. Make sure not to use your fabric scissors on anything except fabric so they will stay really sharp!

Along with your rotary cutter and mat you will need an Acrylic Ruler. There are many different rulers to choose from and they come in all different shapes and sizes. I mainly use my 3" by 18" ruler.


This picture is another example of acrylic rulers.

Depending on what kind of project you are working on you will need a fabric safe marking tool. Pictured below is a Frixxon pen which is what I use but there are a lot of different types of marking tools you can get. Chalk is a common marking tool as well. I like the Frixxon pens because they are easy to see on most every fabric and the ink disappears with heat.


The last item I am mentioning is a washable glue stick. This is something most people already have in their house and if not it's super cheap to buy. This is an optional item, some people don't like using glue on their fabric, I find it very helpful when sewing zippers and with paper piecing.

So that's it! Your list of things you need to get started sewing along with a few optional items that I like. I hope you find this helpful. If you have any questions don't hesitate to leave me a comment, I will get back to you ASAP.

I would love it if you would subscribe to my blog as well as my YouTube channel, share my video with your friends and on social media!

You can also follow me on social media, I included a link to all my social media below to make it easy for you to find me!
Twitter
Facebook
Instagram
Pinterest
Flickr
Just click on any of the social media names and it will take you straight to my feed(s), I would love for you to "follow" me or subscribe to me on any or all of my social media!

Again, I hope you found this video and blog post helpful. If you have any ideas for future posts or videos I would love to hear them!

Thank you so much for stopping by! I'll talk to you again very soon!!!!!